Tips for Use
On the base of the gauge there is an engraved loft and lie measurement for each golf club. Every loft measurement is represented as ‘0' degrees on the loft scale for each club.
For example, if you are measuring a Pitching Wedge and the scale reading is ‘0' degrees on the loft, then your club is correctly sitting at 48 degrees of loft. If you wish to go 2 degrees strong, then your club will be measuring 46 degrees and if you wish to go 2 degrees weak, then your club will be measuring 50' degrees. See (Figure 4)
Remember - the standard loft setting for each club is represented by the "0". Each line moving toward the strong side represents a more upright or stronger angle. Each line moving toward the weak side represents a more slanted or weaker angle of the club.
Operating instructions
Before adjusting any clubs it is important to familiarize yourself with the complete operation of the Loft & Lie Machine.
STEP 1
Set the gauge to the proper club position by removing the brass head pin and inserting the pin into the proper hole – 5 for 5 iron, 6 for 6 iron, etc. (Figure 1)
STEP 2
Unscrew the toe stop, moving it away from the toe of the club.
STEP 3
Make sure the club face is clean and free of nicks. Set the top jaw pin in the left or right hole location per club. Place the club head on the fixed bottom jaw. (Figure 2)
STEP 4
Using the large vertical T-handle, lower the top brass jaw until it rests on top of the club blade, gently securing the club.
STEP 5
Adjust the club so the gauge horizontal straight edge is parallel to the club face score lines. (Figure 2)
STEP 6
Adjust the toe stop so it rests firmly on the toe of the club. (Figure 2)
STEP 7
Now - tighten the T-handle firmly. If the club is not firmly clamped down – your club will slip when you begin the bending process. Don’t be afraid to clamp down firmly – you won’t break the gauge.
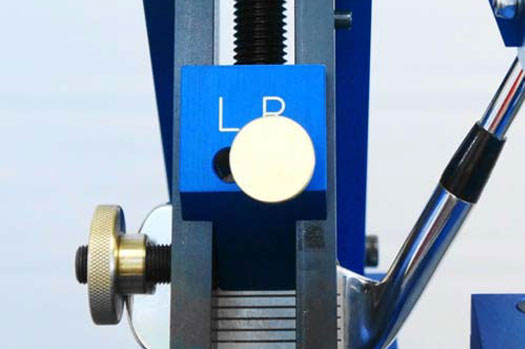
Figure 1
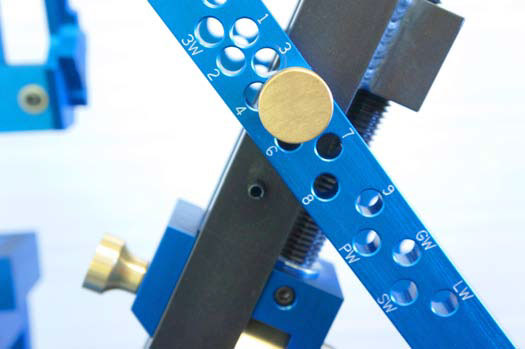
Figure 2
Loft & Lie readings
STEP 1
Slide the reading scale to the club shaft. Hold the scale against the club shaft to obtain the loft readings. (Figure 3)
STEP 2
Pull slightly forward while holding the scale against the club shaft to obtain the lie reading. (Figure 4) Important: These pressures must be held at the same time to obtain accurate loft & lie readings.
STEP 3
Using the bending bar, bend your club to your specifications making sure the club is secured tightly.
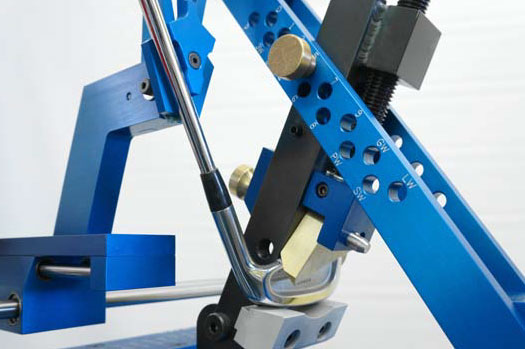
Figure 3
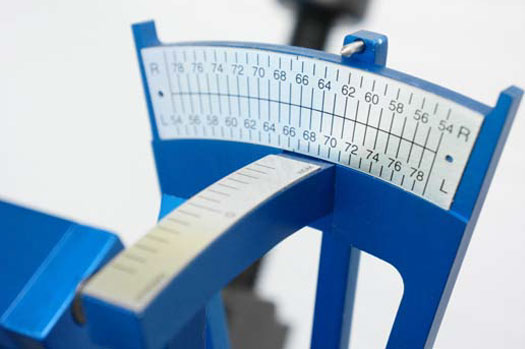
Figure 4
Change tooling
FOR PUTTERS: See Figure 5
STEP 1
After removing bottom jaw, place the putter block on the gauge aligning pin holes.
STEP 2
Remove the top jaw and place either the left or right hand putter clamp.
STEP 3
Rest the putter face against the (right or left) clamp. Clamp the blade within the angle of the clamp. Using the vertical T-handle, tighten securely before making any club adjustments.
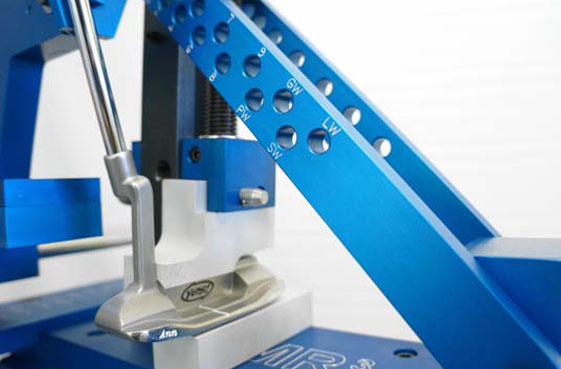
Figure 5
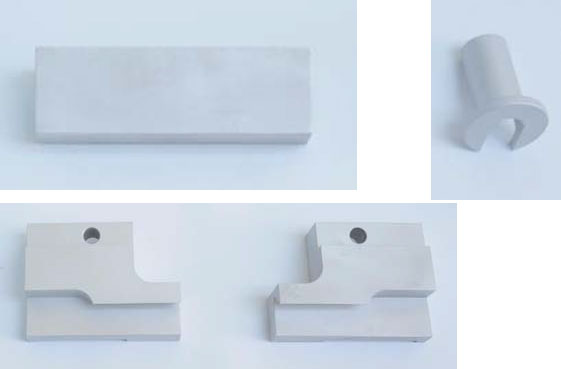
Putter Accessories
Change tooling
FOR WOODS: See Figure 6
STEP 1
Use the gray top jaw and V-block when bending woods.
STEP 2
Place the face plate between the top jaw and bottom V-block. This will provide protection for the face of the club.
STEP 3
Place the rear horizontal wood clamp against the horizontal T-handle to hold and protect the rear of the club.
STEP 4
Using the vertical T-handle, tighten securely before making any club adjustments.
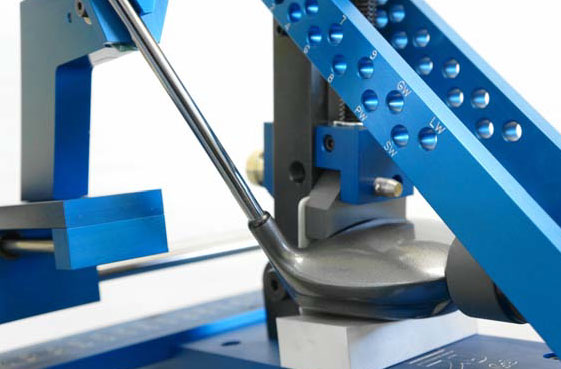
Figure 6
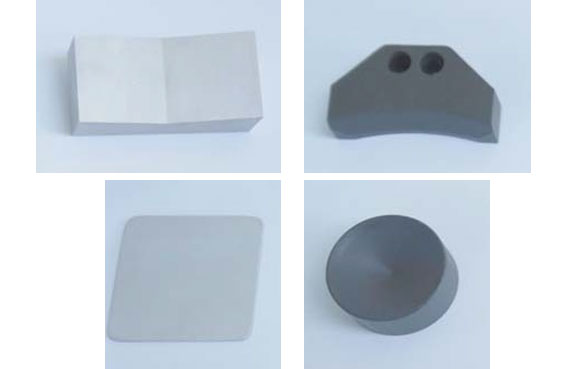
Wood Accessories
Tips:
Many club builders have found it helpful to place a small soft rubber pad between the top jaw and the club to prevent
marring. We have enclosed a small rubber pad for such use.
Keep the Thompson rods lightly oiled at all times to prevent rusting. Do not use WD-40. Gun oil works great!
